 Make Web Ready Photos and Graphics Make Web Ready Photos and Graphics
Great images are worth a thousand wordsAdding
images or photos to your website can make it more visually appealing
and interesting. Photos and images can tell your viewers what your
website is about even before they read the page. You can use your own
personal images and photos or there are several places online where you
can purchase high quality stock photography. Purchasing Stock PhotographyOne really great source for stock photography that EZ-NetTools uses is istockphoto.com.
iStock Photo offers millions of photos and graphics in many different
categories. Each photo or graphic comes in several sizes to suit your
needs. For your website you will need to purchase the small or medium
sized photos or graphics. 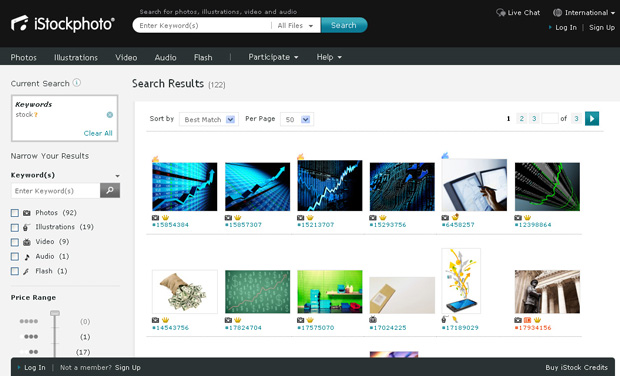
EZ-NetTools recommends purchasing your stock photography from www.istockphoto.com for their great selection and low prices.  Photo Editing Software Photo Editing Software
To
edit photos and graphics you will need to have photo editing software
installed on your computer. There are several different photo editing
software packages out there for you to choose from. EZ-NetTools
recommends purchasing and using PhotoImpact if you do not already have your own photo editing software. PhotoImpact is an inexpensive and powerful photo editing software program.
You can purchase PhotoImpact online at corel.com Power Through PhotographyFew
design elements brighten up a web page more than a well chosen
photograph. Photographs are used to make a dramatic home page, to create
buttons, to display products in a catalog, to create design accents
such as borders, and more. The correct photo, in the right area sets the
tone and conveys the message of the page. Conversely, improperly
prepared pictures not only distract from the visual appeal of a web page
but also take so long to download that your visitor will leave. The
size of your photographs is the biggest factor in download time. Below are some steps to follow to prepare great photos for your website. C-R-O...
Crop, Resize, Optimize.Cropping ImagesYou
can crop your images to make them more visually appealing or to get rid
of dead or distracting space. Keep in mind the photographic �Rule of
Thirds�. Imagine breaking down an image into thirds both horizontally
and vertically. This gives you a grid with nine boxes. Place the points
of interest in your photo at the intersections of this grid. You can
also place certain important elements of your photo on the the four
lines created by the grid. To crop a photo using PhotoImpact you
will need to start up PhotoImpact and open the photo you want to work
with. Next, you will select your cropping tool. Click on your starting
point in the upper left corner of the photo and drag it down and across
your photo. You will see a grid that shows the area of the photo that
you want to keep. The area that is darkened will be the area of the
photo that will be discarded. You can click on the corners and drag the
box to make adjustments to crop tighter or more open. When you have the
desired cropping area selected just double click on it and this will
complete cropping the photo. You will now see what your new photo will
look like. Resizing ImagesResizing your images for web
viewing is an essential step to adding photos to your website. Because
your photos will be viewed online you need to be sure that you are
resizing your images to a smaller file size for faster loading and
viewing times. Using your photo editing software choose the resize
option, put in your desired dimensions for your image and be sure that
your resolution is set between 72 dpi and 96 dpi. Again, using
PhotoImpact you can resize your photos. With your photo file opened in
PhotoImpact and cropped, select Adjust from your main menu. In the drop
down menu select Resize. This will open a new window that contains your
resizing options. You can resize your photo using a percentage or
pixels. We suggest using pixel measurements to resize your photos. You
may notice that there is an option for Aspect Ratio. Be sure that this
is checked. With this checked you will only have to change one number.
You can change either the width or the height and the other will adjust
accordingly. If this is not checked and you change both numbers your
result may be a very distorted photo or image. After you have entered
the desired size for your photo click on ok. Your photo has now been
properly resized. Optimizing ImagesOptimizing your photos
and images for your web page will decrease your image file size and
make sure that no matter what type of connection your viewer has they
will not have to wait long periods of time for your images to load on
your web pages. Optimizing your photos and images will essentially clean
up any extra color pixels and information that is making your file size
larger. Each image editing software program will have the option to
optimize your images. The final step for preparing your photos for
web is optimizing. After you have cropped and resized your photo using
PhotoImpact you will now optimize it. Open your resized photo file. In
your main menu select Web. Select Image Optimizer from the drop down
menu. This will open a new window that shows your optimizing options as
well as previews for the original and optimized version of your photo.
Adjust the slider to the right or the left to get your desired amount of
optimization. Usually there is no need to go below 90 Quality. You will
be able to view the Quality of the photo on the preview in the window.
When you have selected your desired amount of optimization select Save
As to save your new optimized photo. Remember to follow the C-R-O
(Crop, Resize, Optimize) steps for every image that you want to add to
your website. This will create a pleasureable experience for all of your
website viewers. Now that you have Cropped, Resized, Optimized
and saved your images you are ready to upload them to your EZ-File
Manager. You can learn more about your EZ-File Manager on the EZ-File
Manager training available through the EZ-NetTools Launch 2 Success
program.
|