|
An integral part of protecting folders is setting up users. (Protected folders can be created without creating users. However, no one could view any file in the protected folder.) You can set up as many users as you would like. You can also customize what each user is allowed to see. In this section of the course you will learn the first step, setting up the users. Then we will show you the next step, how you protect folders. All of this work will be done within EZ-FileManager. Now, on to creating users. Open EZ-FileManager. 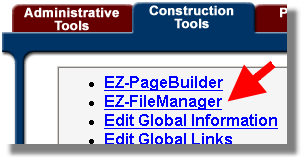
Click on the Users button at the upper part of the page. See the sample of the button to the right.  Click on the create users button. 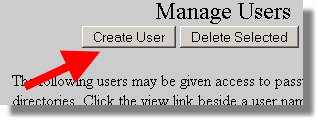
Enter a user name and the password twice, then click on the “ADD” button. 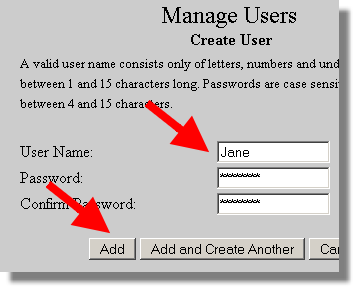
You should see the name you just added. You can now add more users if you wish. They will start to show up in the list as you add them. 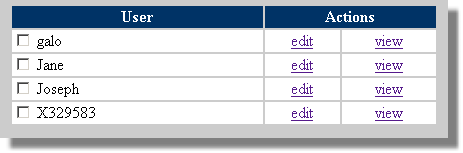
From the list of users you can “Edit” their passwords. If you click the “view” link you will see all of the folders that have been protected and indicate whether this user has permissions to view the contents of the folder. If you have not yet created a protected folder, there will be nothing in your list. This is the page you can use in the future to add or delete permissions granted to a user. 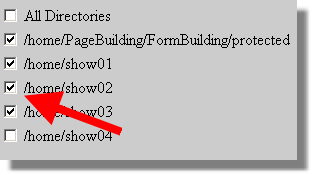
When you are done, click the “Close” button on the Manage Users page to return to EZ-FileManager. If you create a lot of users, you can quickly create a monster to maintain. In this case you should consider assigning a generic user that could be shared by more than one person. Often, it is very helpful to create an administrative user that has access to all protected folders. That way, you will only have to enter the user name and password once while you are creating and maintaining the pages and files in the protected folders.
|

