|
Now we will build the form. Select the place on the page where you would like to create your form. Then add a “Form Builder” block from the list of available blocks. Remember that the “Form Builder” block is like an envelop that controls the overall function of the form and “contains” each of the form blocks. 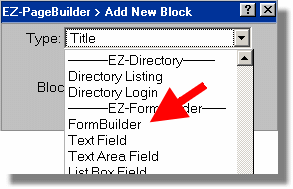
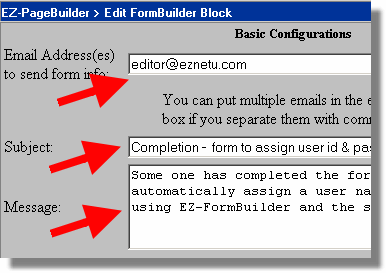
The “FormBuilder” block is the most complicated part of this course. The advanced preparation will come in handy at this point. We will discuss this form one segment at a time. Segment 1 - Configure email to web master. In this segment you will configure who will receive notification that the form has been completed. If you have done your preparation, this segment will be easy to complete. - Enter the address of the web master who should receive the email notification that the form has been completed. Normally, this could be yourself
- Enter the subject and the message you want in the email you will receive. I suggest that you make the subject and the message as descriptive as possible. Most people get so much email, it is often hard to pick out the real messages from the SPAM. I have also found that over time I have a number of messages sent to me via forms, and I cannot remember what they are for unless I provide careful instructions to myself.
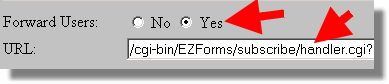
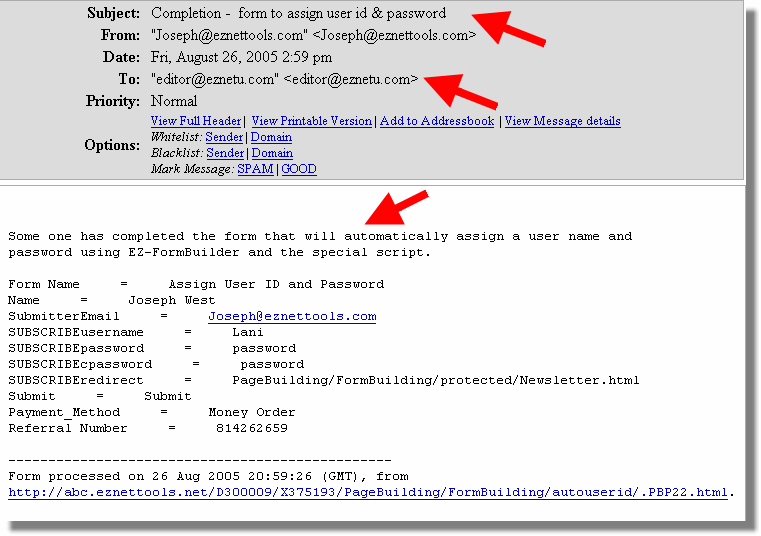
Click here to see a sample of what this email will look like. Segment 2 - Where to forward users. If you have used Form Builder before, this segment works differently than it usually does in other forms. In this one case, you will be specifying a special program that will be running rather than a web page as you would normally do. - Select the Yes radio button.
- For the URL enter the following URL exactly (on this page, the URL may wrap to the next line.) Since the URL you enter is larger than the field on the block, only part of it will be visible: http://www.yourdomain.com/cgi-bin/EZForms/subscribe/handler.cgi?session_id=[session_id]&submitter_id=[customer_id]. Substitute your domain name into the previous string. (If you do not have a domain name, then begin with "/cgi-bin/..." as you see in the image below) What you enter in this field is what makes this form function differently than any other forms.
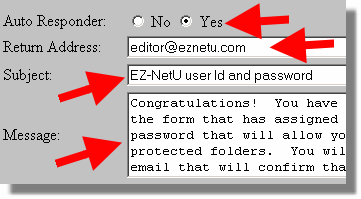
Segment 3 - Email list. Skip the “Add to EZMailList” section. Segment 4 - Auto responder. This section deals with the auto responder that will be sent back to the person completing the form. Your prior preparation will make this segment go quickly. Complete the following data fields. - Select yes.
- Enter the return address you want to appear on the email the customer will receive upon completing this form. Typically, it will be the main email address associated with your website.
- Enter the subject and the message. Choose your words carefully because they will appear on the message your customer will receive. You will want to make sure that the message clearing indicates what the purpose the email is about, maybe make a reference to your web site and what action they just submitted. You might want to explain what additional information they will be received and how to use it.
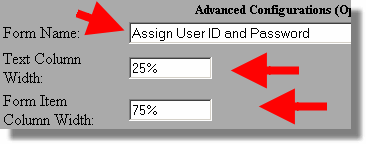
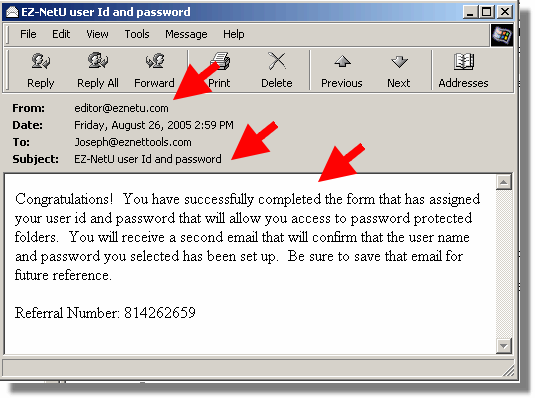
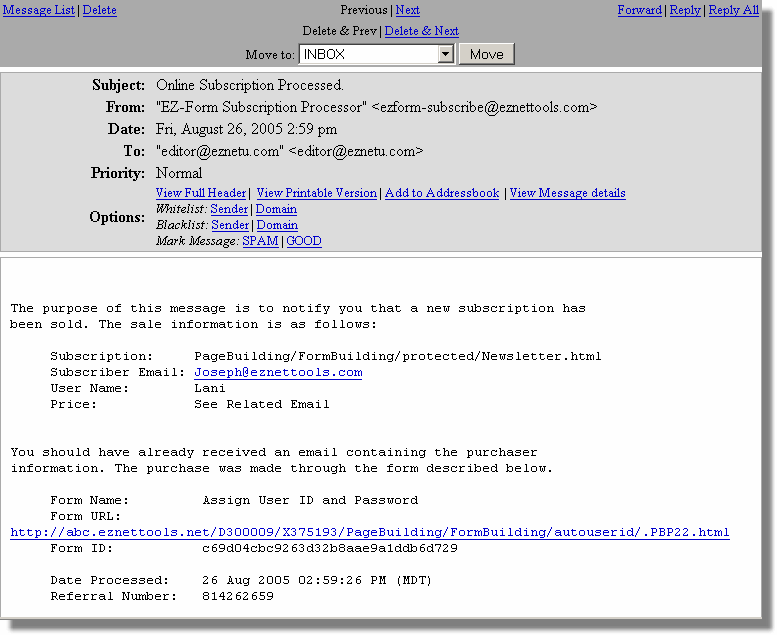
Click here to see what this email will look like to the person completing the form. Segment 5 - Advanced configuration In Advanced segment, there are some changes that are "nice" to do but are not required. - Enter a unique form name to replace the default value of “form1." While this is an optional step, I am found it to be very useful to have descriptive names. If you have access to EZ-FormManager, you will find this very useful.
- To help the fields on the form line up, I typically use a “Text Column Width” of 25 % and “Form Iteam Width” of 75 %.
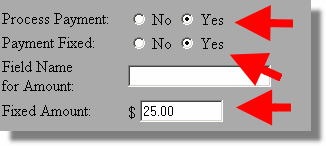
If you desire to process a payment with this form, you will need to configure the payment part of this segment. - Further down in the “Advanced Section” check the “yes” button for Process Payment. (Note: this script will still work even if you do not require an associated payment.) In my example, I have selected a fixed payment of $25.00 so I enter this information.
Another optional, but helpful step is to associate the “Key Field Name” with the name of an important Form Block. In this example, I will create a Form block with a name of “Name.” By doing this, the listings in EZ-FormManager will be more useful. 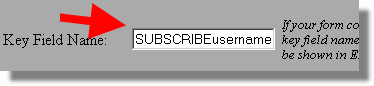
Now submit the form block. Whew! That is a lot. The rest of the course is down hill.
|

