|
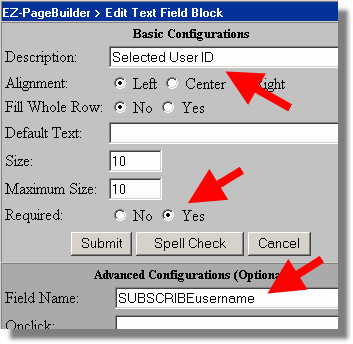
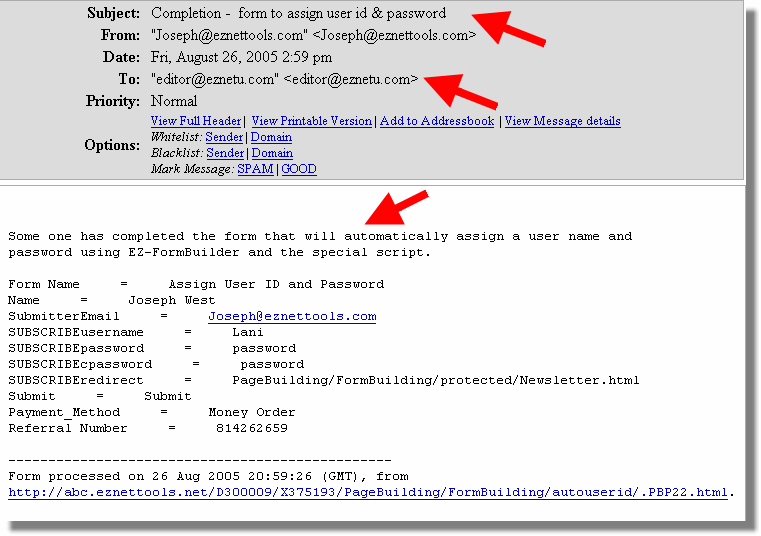
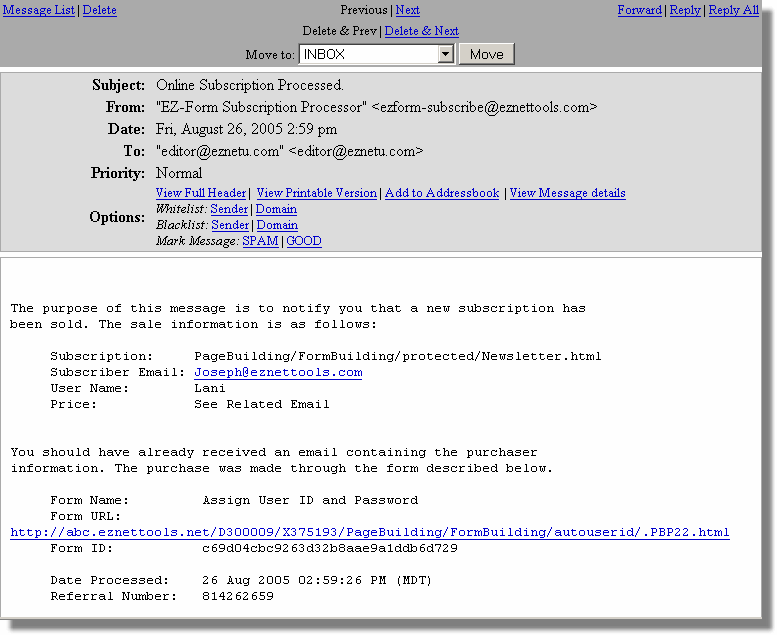
Since I had selected the option to have an “autoresponder”, the system has already created an email address. There are four more required Form Builder Blocks required by this special script. The order of these blocks is not critical but the Names you assign to the Fields are critical. The first additional block is a Text Field Block for the customer to specify the User ID they wish to use to login into the password protected folder. The Description can be anything you want. However, the Field Name must be “SUBSCRIBEusername”, including the capitalization but not including the quotation marks. You should specify this as a required field.
The next block is also a Text Field Block for the customer to specify the password they wish to use. Again, the Description can be anything you want. However, the Field Name must be “SUBSCRIBEpassword”, including the capitalization. You should specify this as a required field. The next block is also a Text Field Block for the customer to confirm their password. The Field Name must be “SUBSCRIBEcpassword”. Note that there is an additional “c” in this name. You should specify this as a required field. The next block is a Hidden Field block. Unlike the other form blocks, the Hidden Field block will not display in the finished page. It is used to pass information that the user does not need to enter or see. In this case we need to pass the name of the URL where the user should be directed after completing the form. You need to indicate the page name including the folders. The URL is relative to your home folder. So you do not have to specify the “http://....” See the example below. Note that in my example the complete URL is not visible. The Field Name is “SUBSCRIBEredirect”. Again, capitalization is important. 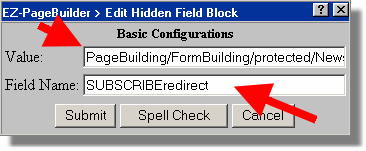
The last block is Form Button block. The result of this block is the submit button that makes the form function. Usually, I typically us a label as “Submit” or "Submit Form" and specify this block as a Submit. 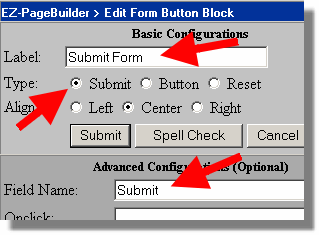
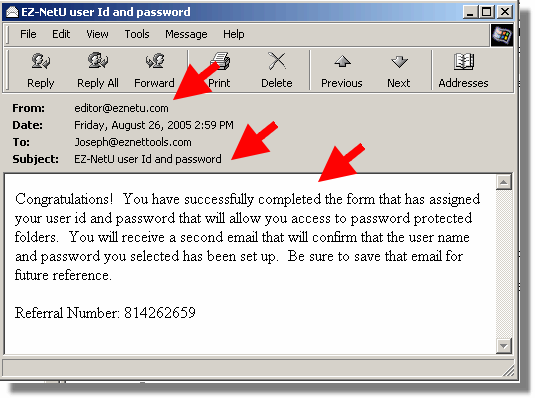
You can add other form fields to collect other information such as names and addresses as would be appropriate for your circumstances. There is a lot of fancy programming you can add to a form using javascript. However, that is beyond the scope of this form. You can arrange the form fields in any order. In the navigation section of this course to the left, there is a link to a sample page that uses this form. It is a fully functioning form that will allow you to create a user ID and password to a password protected folder of EZ-NetU. You will be able to see how everything works including the associated emails.
|

